|
TO3000 3D supports database structure customization in the form of adding custom fields to certain tables in the database. Custom fields can be added via the Fields section of the Advanced Settings window.
To edit custom fields: 1. Go to Backstage > Advanced Settings. 2. Click the Fields section.
The following windows contain Custom fields tabs: 1. Clients:
2. The Main tab of the Project window (Next to Project profile)
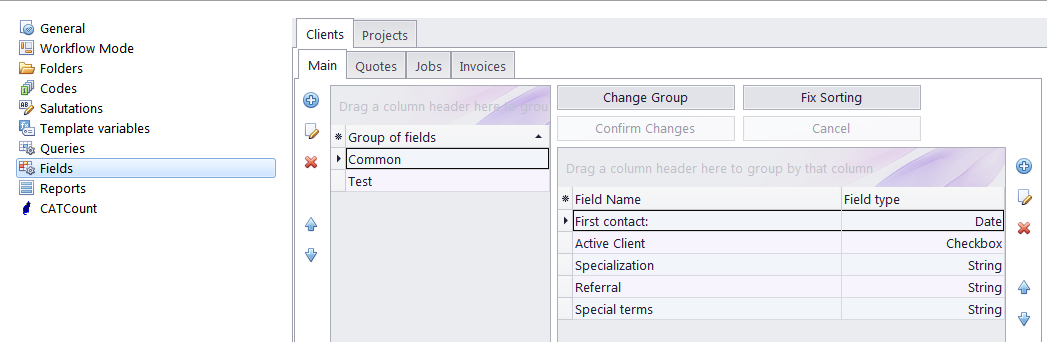
Creating groups of custom fields 1. Select the table to which a new custom field must be added by selecting the corresponding tab. 2. Click the New button from the left-hand column of buttons. 3. Specify the name for new Group of fields in the New Custom Group of fields window. 4. Click OK to save changes or click Cancel to discard.
To edit/delete a Group of fields select it from the list and click Edit or Delete button correspondingly from the upper button row.
To change the order of the Group of fields, i.e. the order of tabs within the Custom Fields tab, use Move Up/Move Down buttons.
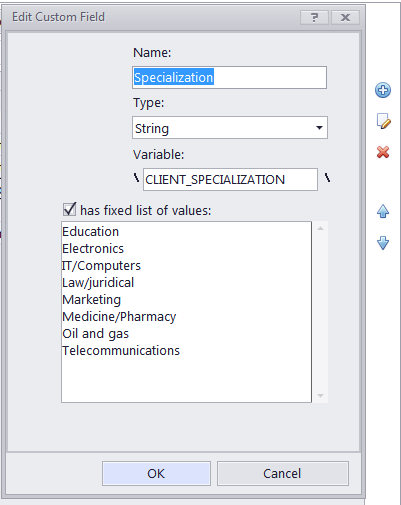
Creating custom fields 1. Select the necessary Group of fields (if you have created more than one). 2. Click the New button from the right-hand column of buttons: 3. Fill the fields of the New Custom Field window: ·Enter the name of the new Custom Field in the Name text box. ·Select the data type of the new Custom Field from the Type drop–down list.
·(optional) Enter
the name for the variable that will possess the value of the new
Custom Field; you will be able
to use this variable in the .RTF templates. ·Click OK to add the specified Custom Field or click Cancel to discard.
To move a Custom Field to another Group of fields, i.e. another tab, click the Change Group button, and select the target group in the window that opens. To confirm all changes you have made, click the Confirm Changes button. To cancel all changes click Cancel button. The new custom fields appear on the Custom Fields tab of the respective TO3000 3D windows.
See also: |