|
Invoices can be created on the Invoices tab of the Client window.
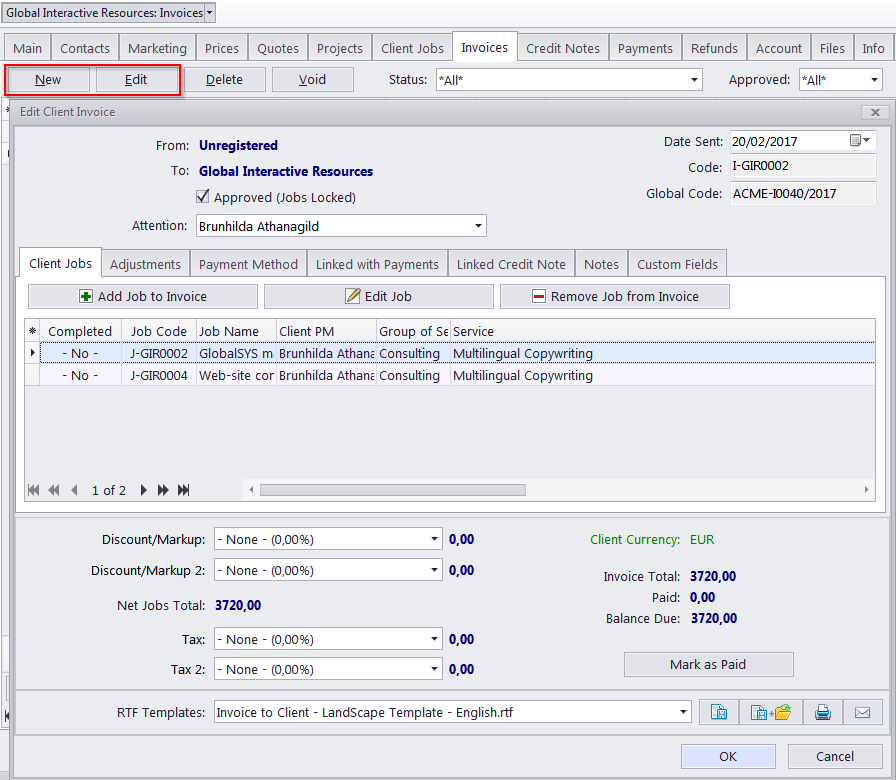
New/Edit Invoice window All invoice information can be added or changed in the New/Edit Invoice window. To open this window for the selected invoice, click New/Edit or double-click this invoice in the list. Approved - by approving the invoice, you can prevent the changing of Client Job data in the jobs added to this invoice. Date Sent - this date is considered to be the invoice's issue date (no matter when the invoice has actually been created) when applying payment terms. See the Payment Terms of Client topic for details. Code - also called the "Client-specific" code, generated automatically. The "I" character means that this is an invoice, letters afterwards represent the code of the client and the number is the value of the invoice counter for this client. Each client has an independent counter for this code. Global Code - the global code is generated automatically. The global invoice code's layout can be configured in the Codes section of the Advanced Settings window. The non-configurable portion of the code (digits) represent the global invoice counter. Attention - select one of the Client's contacts for this field. Their name will be displayed in the resulting invoice document. Please see the Contacts List topic for details. Client Jobs - lists the client jobs ("items") of this invoice. Use the Customize columns option to configure which data should be displayed. Mark as Paid button - allows you to quickly create a payment according to the total of the invoice and automatically link it up. Adjustments - adjustments are added to invoice totals. Discounts and taxes are not applied to adjustments. Payment Method - you can add payment details (banking, credit card number, PayPal account and so on) to your invoice in the form of payment methods. To configure payment methods click Business Settings in the Backstage view and select the Payment Methods section. See the Payment Methods topic for details on how to add or edit options on this tab. Linked with Payments - unless the full amount of the invoice is linked with payments, the status of this invoice will remain outstanding. On this tab you can check if the invoice has been linked with payments. Payments can be linked to invoices from the Edit Payment window only. Also, Phantom Payments can be created on the Linked with Payments tab. These are used to balance disregarded parts of invoices, which keep Invoices with Outstanding status, and make them Settled. Linked Credit Note - This tab displays information on the credit notes linked to this invoice. Credit notes are linked to invoices during creation.
Notes - any additional notes which your invoice must include, can be added on this tab. Discount/Markup - invoices can have up to 2 discounts and markups. These are applied as positive (markup) or negative (discount) percentages to the invoice subtotal. To configure discounts and markups click Business Settings in the Backstage view and select the Discounts/Markups section. For more information on adding or editing discounts and markups please see the Discounts/Markups topic. Tax - each invoice can have up to 2 taxes. Taxes are applied as percentages to invoice subtotals plus discounts/markups. To configure taxes click Business Settings in the Backstage view and select the Taxes section. For more information on adding or editing discounts and markups please see the Taxes topic. If the client's currency differs from your base currency, the Currency Exchange Rate button will be available. By clicking this button, you may change the currency exchange rate used in this invoice. Note that this button does not change the general exchange rate stored in your TO3000 database. To change exchange rate for all future credit notes, go to the Exchange Rates tab of the Business Settings.
Saving and printing Invoices You can print invoices or save them in text files by selecting an RTF template and clicking the Save, Save and Open or Print buttons at the bottom of the window. Click Send Mail to open the Mail Sender for the generated invoice.
To edit templates for invoices click User Settings in the Backstage view and select Templates. Templates for invoices are located in the C:\Users\Public\Documents\AIT\TO3000, Version 3D\Templates\CLIENTS\Invoices\ folder
See also: |